Spring Mash-Up!

Dogwood Birds Banner

We’re still excited about releasing our new April Catalog for Summer, but we’ve still got some great samples you haven’t seen from our January Spring release. This week our Design team will treat you to all the inspiration from our October and January catalogs that they haven’t posted yet. And it’s a wonderful Spring-a-palooza!

Jamie Martin

Louise Healy


One thing we haven’t shared enough yet, because they’re our favorite thing right now, is our Spring Borders Die Set. Fran herself had an opportunity to play with these this last week, and she created a terrific collection of even more ideas for these wonderful edge dies.

You remember that the set looks like this –

Spring Borders Die Set Packaged
DCP1009 Spring Borders Cutting Dies

It has 6 dynamic cutting dies for a huge variety of looks and uses. Well, Fran said, “what if I just get into the stash of scraps we have and go crazy?” She cut a ton of strips and just had a great time layering them on to cards. Card-making doesn’t get easier than this!! It’s all about finding a color story in the scraps you love and just playing with the shapes and patterns.


Can you spot the Easter bunny??

Glitter papers, adding some white with a greeting here and there, you can even make this the surprise interior of a card with a fun window peeking through!


She even used the strips to decorate a hat pattern that she downloaded from the web. Wouldn’t these be a cute project for a little girl’s party!! What fun!

So we have to tell you that the hat above that Fran made is actually sized for her cat, Beaver. We challenged her to get a photo of him wearing it, after all she would have to tie it under his chin, and cats aren’t known for their love of hats… but SHE DID it! And she even got photos!! She’s not even bleeding! Good job, Beaver, such a good sport!!


You’ll still see a lot of projects using these great border dies in our April catalog as we go, our team just loves them so much! And Fran may just have more ideas as we go along, she’s always thinking of something special. Come back Wednesday for more recap from our January catalog projects!


Spring Borders Dies – WINNERS!

Spring Borders Die set

Last week we had so much fun with our Spring Borders Dies, and you’ll want to keep watching for them in the future since our team used them on so very many samples!

We have some winners from last week! If you winners will send an email to submissions@stampendous.com and send us your U.S. Mailing address, we’ll get these darling dies out to you immediately! Thank you for your kind comments! They mean a lot to us.

Samantha Houp from Janelle’s blog

Jeanne Beam from Louise’s blog

Tracy Magner from Jamie’s blog

Just a reminder to everyone. If we draw your name as a winner, but have no way to confirm that you live in the U.S., we draw another name. You need to make sure that some profile for you somewhere tells that you have a U.S. address. Even if you just write United States for your address online. We do try hard to verify, but this week we had to replace some winners who had no data available.

Pumpkins in a Row

We recently asked craft artist Brenda Enright to create a cross stitch piece for us using our Damask Pumpkins. We were submitting it to a magazine that ceased publication before the project could be used, but we had to share it with you here! It was so fun and easy to make.

Brenda used our Damask Pumpkins stamp on tiny graph paper to create a cross stitch pattern, then stitched it on a swatch of natural colored cloth.

cross stitch pattern

cross stitch closeup

Simple, iron-on adhesive adhered that to a piece of gingham then to this darling Saggy Bag by Canvas Corp.

treat bag by Brenda Enright

The addition of some pom pom trim and a festive bow finished the project.
Brenda then created this darling party invitation to match her party bag –

pumpkin card

We just loved this ensemble, so we asked our in-house artist to make a scrapbook page to complete the ensemble. Debi Hammons did just that, and we think it’s fabulous!

P204_BE_DH_800
Now that’s a versatile and well used stamp! This stamp could be used with a darker gloomy color palette and a few glittery cobwebs for a frightful Halloween project.


P204_Damask_Pumpkins_blog crop
P204 Damask Pumpkins

We’ll be back tomorrow with more designer projects, for now we have some great ideas in our project gallery.


Cackling Witch Fun

We love a great Halloween invitation, one that shows exactly how much fun will be had if we go! And oh, it would be great to share in our scrapbook pages afterwards. Our Witchy Dance Stamp can accomplish this and more with some creative imagination.

Q203 Witchy Dance Wood Mounted Stamp (also available in Cling Rubber)

But it’s also awesome for your Halloween party decor, like this gum ball machine created by Debbie Cole to entertain trick or treating guests. If you’d like to make one, too, you can find the unfinished gumball machine from Viking Wood Products HERE. They generously sent one to Debbie for this project.

Tricky Words Gum Ball Machine by Debbie Cole

There’s more projects to entice you to watch our witchy wonders this week.

Jamie Martin

Rhea Weigand

Butterfly Pattern by Kristine Reynolds

Beautiful Butterflies

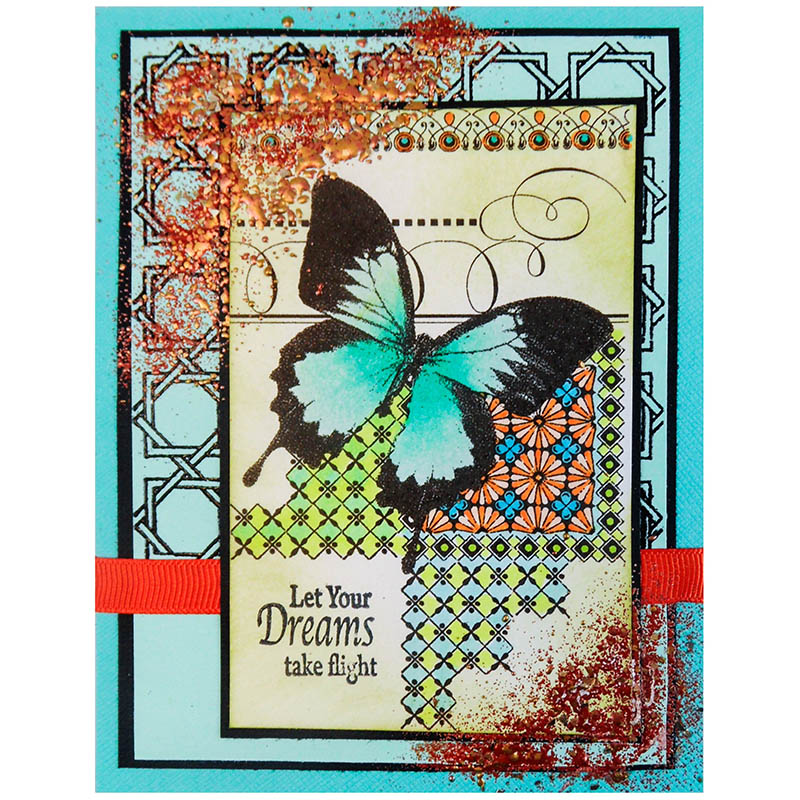
Our Spring Collage images are just perfect for a quick and colorful card! Pick certain areas to color, color the whole thing, don’t color any of it! Stamp on patterned paper for a quick card, or layer over many other images for a textured wonder! These great images are super simple to use.

You’ll notice that each of the images has a “space” that’s perfect for a greeting! Well, our Quotes greetings sets have lots of words that fit beautifully in those spaces.  They are:

Angel Wings Perfectly Clear StampsSSC1201 Angel Wings Quotes

Regal Bird QuotesSSC1202 Regal Bird Quotes

and

Royal Heart Quotes Perfectly Clear StampsSSC1203 Royal Heart Quotes

Here, DT member Kristine Reynolds shows how several layers plus some Encrusted Jewel Technique make a really dynamic card. You can get the supplies and directions for this card on our website.

Butterfly Pattern by Kristine ReynoldsButterfly Pattern by Kristine Reynolds

Keep visiting this week as additional Design Team members have projects to share with these terrific butterflies!

Stack Art Challenge – The Finale

Wow, what a week! Hope you’ve been hopping around all the blogs leaving comments so you can maybe win some Stack Art! The prize consists of one Stack Art Kraftboard Kit, one Stack Art Stamp Set and one Stack Art Elements kit. We’ll give three of these prize packages to commenters this week on the participating blogs!

Designers have done so many fantastic things with our Stack Art kraftboard pieces. It’s so fun to see all the possibilities.

Here, Stampendous owner Fran Seiford, has created a tribute to all four seasons using the Stack Art Regal Bird Kit and the Tree Poem Stamp. Punching holes and wiring the kraftboard pieces together, this simple but dynamic piece was easy to assemble.

Stack Art Four Seasons by Fran Seiford

In a similar project, Fran used our Floral Lady to create a lovely Spring themed Triptych. Assembled with large jump rings fashioned of wired.

Floral Lady Triptych by Fran Seiford

Finally a little Snow Fun is just as easy to make. Here brads are placed through the holes and then wired together in the back. This features our Bird Knit Hat, Sweet Snowgirl, and Winter Wonderland stamps.

Winter Fun Stack Art by Fran Seiford


You can see that the possibilities with these versatile kits are literally endless! Let’s see what today’s designers created with the terrific products we sent them. Be sure to leave your comments so that we can enter you to win some of your own!

Jamie Martin

Lea Kimmel

Martice Smith II

Elly Pirally

Wendy Price

Debbie Cole


Coloring our World with Tombow

Blog Hop_Stampendous

We’re having so much fun this week coloring with Tombow. And we have a very special treat for you today! Tombow’s amazing designer Marie Browning made a terrific tutorial of techniques for our Design Team to learn to use these terrific products. We’ve got permission from the folks at Tombow to share it with YOU! We think you’ll find these techniques as easy and dynamic as we did. If you click on this you can download the pdf to your computer to follow along with Marie.

Stampendous andTombow

If you find yourself making something cool with your Tombow markers and Stampendous stamps, we’d love to link to your creation on the web! You can tag us on Facebook, Instagram, Twitter, or Pinterest by putting #Stampendous in your post. You can upload to our Flickr Group, or email us your projects with the link in the left sidebar of our blog!

Our Design Team has some cool things to share and we’ll be giving away prizes at the end of this week, so you’ll want to comment on all the projects! We also hope you’ll like us on Facebook and any other Social Media where you find yourself! Thanks!!

Kristine Reynolds

Jamie Martin (Simply Color)

Jamie Martin (the Dog Did It)

Krissy Fossmeyer

Janelle Stolfuss

How Charming!

Blog Star Jennifer Ingle made this beautiful charm bracelet using our “Charm Collection Perfectly Clear Stamp Set” and shrink plastic. What a fabulous idea! Now this is definitely “out of the box” and “off the paper trail” thinking.


Supplies:
Charm Collection Perfectly Clear Stamps
Shrink Plastic
StazOn ink
Beads
Jewelry wire
Clasp
Crimp Beads
Jump Rings
1″ Circle Punch
3/16 Hole Punch
Heat Gun

Instructions:
Punch five circles from shrink plastic.
Stamp each circle with an image from the stamp set.
Punch a hole in the top of each circle.
Use a heat gun to shrink the discs into small, round charms.
Attach a jump ring to each charm.
Cut a length of jewelry wire to the length desired.
Use a crimp bead to secure the flat part of the clasp to one end.
Alternately string several beads and the charms to create your bracelet.
Use a crimp bead to secure the clasp on the end of the bracelet.

It’s Still Cold Outside!

It’s still cold outside – unless, of course, you’re in So. Cal or Hawaii or maybe Florida.

Our Blog Star, Janelle Stollfus, sent us this cute scrapbook page, featuring Stampendous’ Cold Outside Stamp.

“I haven’t scrapbooked since the early 1990’s! I have so much more goodies to use now, like gluing Cotton Ball White “snow” right on to the edges of my pictures! I also had fun adding snow drifts into the corners of the cascading photos too. It can get messy, but a dry paintbrush will get all the loose flock off your photos.”  – Janelle

"Baby It's Cold Outside" by Janelle Stollfus

Supplies:

M262-R Cold Outside
CRS5013 Cling Jumbo Merry Magical
FL400 Cotton Ball White Fun Flock
Black ink pad
2- 12 x 12 scrapbook paper complementary colors
4 square photos
Repositional tape runner
Liquid glue (Alene’s Tacky Glue used)
Foam adhesive dots
Sewing method (sewing machine or paper-piecer and threaded needle)
Ribbon scraps
Circle cutter and punches (small and large for background)
Stamp-a-Majig

“The fun embellishment on this layout is adding Cotton Ball White Fun Flock around the edges of the photos. Use some liquid glue that will hold its shape when dry. Sponge on some glue and then add dollops of glue! Spread the large mounds around with a wooden skewer or even a scrap piece of paper and pour Fun Flock over it. Set aside the photos to dry while you put all the other elements down on the base cardstock. Add the photos and then “drifts of snow” around the photos by sponging more glue.  Happy scrapbooking!.”  –Janelle