WindowRama Photo Frame Card Kits

WindowRama Photo frame Card Kits

Our brand new WindowRama Photo Frame Card Kits are an easy and beautiful way to send a holiday or everyday greeting!

Simple to assemble, each package comes with enough pieces to make 8-3D diorama cards that stand for display and fold flat for mailing. Envelopes and a small stamp set of greetings are included. You can simply glue them together and add a photo or gift card in the pre-punched slots, or you can embellish them as much as your heart desires.

WindowRama Photo Frame Card Kits are available in Christmas, Winter, Wedding, and Baby themed sets. Baby and Wedding are ideal for Everyday occasions as well. You’ll find them in your local stamping and scrapbooking store or on our website (where your orders are filled by a local, independent store!).

We’ve created a series of YouTube videos that will show you the basics of assembling these easy-to-use products, and they will give you some additional ideas for adding your own artistic flair if desired.

The Basics of the WindowRama Photo Frame Card Kits

Beyond the Basics – Christmas WindowRama Photo Frame Card Kits

Beyond the Basics – Winter WindowRama Photo Frame Card Kit

Wedding/Baby WindowRama Photo Frame Card Kits


New Die Sets Plus Winners!

Our newest die sets are super versatile sets that you’ll reach for all year round. They’re great for holiday card making, but they have some awesome elements you’ll use again and again all year! Fran made some great samples with these which are shown in the video below. And our Design Team has been playing with these and others all week. Check out their links.

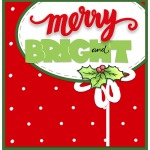
First, Christmas Bright  includes a couple of small clear stamps, nesting cutting die words which will look great out of your favorite paper patterns or cardstock colors, a bow to duplicate as many times as desired, and nesting ovals which will be awesome for so many everyday uses!

CSD21 Christmas Bright Dies

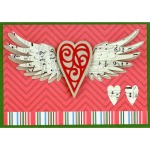
Our second new die set is Wings Die Set. Send holiday love to friends and relatives, then send more love all year! Great for Valentines, wedding, anniversary, or just a quick “I love you.”

DCP1010 Wings Die Set

Fran has had so much fun with these sets that she’s made a great, short video to share them with you! You’ll love all the inspiration, ideas, and clever tricks she’ll show you. Plus the end is full of samples from our whole team.

Here are some of Fran’s projects, there are instructions and supply lists for all of them on our website.

The Design Team has also been playing with these wonderful new die sets and our current die sets adapted for the holidays!

Janelle Stollfus

Jamie Martin

Lea Fritts


WINNERS

Last week we featured our wonderful new 6″ X 6″ background stamps, Winter Blizzard and Poinsettia Collage. Three lucky winners from last week’s comments on our blog, YouTube video, designer blogs and Facebook will win both of the stamps to enjoy this holiday season.

Our lucky winners drawn by random.org are:

Regina Hay

Kareajo

McStamper

You lucky people, please email us with your U.S. Mailing Address at submissions@stampendous.com, and we’ll get your prizes right out to you!

The Newest Products to Die For!

We have a couple of new die sets in our latest release, and we think you are going to be so excited by these super versatile sets that you’ll reach for all year round. They’re great for holiday card making, but they have some awesome elements you’ll use again and again all year!

First, we have this awesome Christmas Bright die set. It includes a couple of small clear stamps for the word “and” and the small holly so that you have something you can color or stamp in color. The words will look great out of your favorite paper patterns or cardstock colors, and the bow and nested ovals will be awesome for so many everyday uses!

CSD21 Christmas Bright Dies

Our second new die set is this gorgeous Wings Die Set. This versatile set can send holiday love to all your friends and relatives and then send even more love all year! Great for Valentines, wedding, anniversary, or just a quick “I love you.”

DCP1010 Wings Die Set

Fran has had so much fun with these sets that she’s made a great, short video to share them with you! You’ll love all the inspiration, ideas, and clever tricks she’ll show you. Plus the end is full of samples from our whole team. All of these great projects are on our website with full supply lists and instructions.

The Design Team has also been playing with these wonderful new die sets and our current die sets adapted for the holidays! Check out their creative cards and come back Friday for more fun!

Alison Heikkila

Jamie Martin

Kathi Rerek


Love is in the Air

Valentine banner

We’re celebrating LOVE with the rest of the world this week! Valentine’s Day is Wednesday, February 14, and we have so many wonderful images for celebrating! Our Design Team sends their love this week by creating gorgeous projects with our love-ly images. You can always find any of our love images in the Stamps/Valentines Category on our website. You can visit it by clicking on that link or on the banner above.

You can see by our banner that some of our most loving images feature the irrepressible House-Mouse Family! These little mice are always showering one another with love, just like in the image above called Glitter Hearts! In fact, some of the wonderful design team from the House-Mouse and Friends Challenge Blog  (or if you’re need of a steady stream of sweet mice, visit them on Facebook) will be joining us this week to share their Valentine greetings with all of you. Let’s start with them:

Bunny Hoyle

Vickie Y

Christine Craig

Lorraine Aquilina

Sue Drees

And we thought we’d share the Valentine work of the recent winners on the HMFMCB –

Misti

Becky S

Janette van Otterio


Even artist Andy Skinner’s Team is dreaming of Valentines this week. Check out these incredible mixed media posts. We sure love them!

Brenda Brown


And, of course, our own Design Team has some love to share with you!

Louise Healy

Alison Heikkila

We hope you’ve got your favorite Valentine something sweet that’s ready to go! We’ll be back Wednesday to share more love!!

Bee Mine with Stencils


Today, we are wrapping up our Bee Mine theme week with this terrific gallery of love themed stencils and project ideas! Click on the stencil’s caption to find more product and project information on our website!


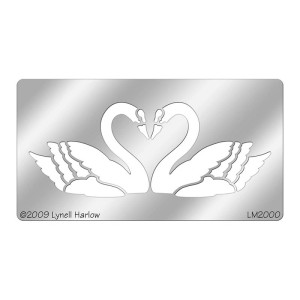
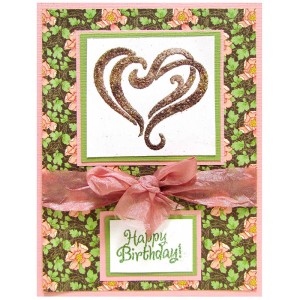
From large to small and simple to ornate these stencil designs are the perfect symbol to share for weddings, birthdays, Valentine’s day and any occasion you want to make special.

If you missed our week of posts here’s a handy list of links from each day. Stop by and be inspired to create with Stampendous over the weekend!


Friday

Louise Healy

Pam Bray

Lea Fritts

Jamie Martin

Wednesday

Stampendous Blog

Kristine Reynolds

Janelle Stollfus

Jamie Martin

Monday

Stampendous Blog

Alison Heikkila

Kristine Reynolds

Janelle Stollfus

Whispers of Love

Sharing the quiet moments of love couldn’t be more easy than with these two amazing House-Mouse Designs® images about small whispers of love. These tiny gestures of fondness are so cute and appropriate for our Be Mine theme week, that I can’t wait to share them.

Here’s the House-Mouse Designs® Be Mine stamp illustrated by Ellen Jareckie. Now I can see this image being used for anniversary, weddings, and scrapbook pages.

HMP21_Be_Mine_rendered_800
Be Mine Stamp

If you hopped earlier this week you might have seen this darling colored sample from Rhea Weigand and below it’s linked up to a supply list with instructions.

HMP21_RW_800
Be Mine by Rhea Weigand

Tails Entwined stamp, also from House-Mouse Designs illustrator Ellen Jareckie, is squealing cute with spring. It’s the perfect little card for a new or old romance card.

HMP20_Tails_Entwined_rendered_800
Tails Entwined Stamp

We just love this card from Lea Kimmel and it has a supply list and instructions on our website.

HMP20_SSC1213_LK_800
Tails Entwined by Lea Kimmel

Our designers today have some love to share with their projects. Have fun!

Kristine Reynolds

Jennifer Dove

Tenia Nelson


Birdie Love, Be Mine

A very sweet friendship is afoot with Amanda Mouse and her springtime friend. It’s one more step towards spring when creatures are out to play like the two in this Birdie Kiss stamp. I think I’ll just say ADORABLE and leave it at that.

HMR18_Birdie_Kiss_rendered_800
Birdie Kiss Stamp

It’s so great to see these stamp come to life with the touch of color and here Jennie Lin Black’s card has some fabulous color and flare.

HMR18_SSC1202_JLB_800
Birdie Kiss by Jennie Lin Black

Here’s a sample from me for the January catalog and it comes with instructions, so just click on the image or caption beneath it.

Janelle's Bird Kiss
Birdie Kiss by Janelle Stollfus

Are you ready for a big line up of designers today? We have delivered for a fun time hopping. Be sure to leave a little bit of comment love along the way so the designer’s know you stopped by.

Jamie Martin

Pam Hornschu

Jennifer Dove

Amy Hurley-Purdie

Lea Kimmel


Kisses Galore

It’s February, Stampendous fans, and we’ve got you covered with our love themed stamps! The Kisses Galore background stamp will set the stage for your greeting cards or scrapbooking events with your loved ones.

R219_Kisses_Galore_rendered_800
Kisses Galore Background Stamp

Once the stage is set with Kisses Galore, how about one Kiss to seal the design.

E279_Kiss_Rendered_800
Kiss Stamp

Monika Thomas paired these stamps together and added a sentiment from the Life Words Perfectly Clear Stamp Set in a great valentine red design.

E279_R219_SSC1213_MT_800
Kisses Galore by Monika Thomas

It’s going to be an adorable week of inspiration to help you say, “Be Mine” in so many creative ways and today’s designers are ready to get you started.

Jennifer Dove

Jamie Martin

Rhea Weigand


Skulls Galore!

Howdy Crafters!

We had a fabulous time last week partnering with Add A Little Dazzle and the Dazzling Divas. Both teams created such fabulous projects that we started a Pinterest board for you to be able to easily see them long after our collaboration week was over. We love to share with you when we have a collaboration week so there was a chance to win some of the goodies we used, three prize packages to be exact, for commenting on the design team blogs throughout the week. We will be posting the winners in a separate post.

We are chattering to the bone with excitement over this week’s Skulls Galore theme.

A Skeleton Wedding Card
Happily Ever After Card by Suzanne Czosek
Suzanne Czosek created this wedding card that delights us right down to the marrow of our crafty little bones. She used Skull Roses and Mr. Skulleton as wedding party and for the friends and family a Skull Stack background.

Here are some more designer projects being shared today.

Kristine Reynolds

Janelle Stollfus

Pam Hornschu

Take this Stampendous Skeleton link to view all of our available products for this week’s theme.

My Dream Day layout – by Asia King

Hello Stampendous fans! Time for another inspiration from your favourite Foreign Correspondent Asia King :). Today is quite special because not only I’m sharing a scrapbook page but it’s a layout of my Dream Day – my Wedding Day that is :).

Let’s start the creative process, shall we?

For the first stage you will need: kraft and patterned papers, mini mister, sanding file, Martha Stewart decorative punch, Vintage Photo distress ink, blending tool.

First, we are going to distress the edges using a technique I first saw in the UK’s Scrap365 magazine.

1. Your kraft card will be your base – you can distress it or leave it unchanged, as I did here.

2. Punch a decorative border all around the patterned page that will be your first background layer. Keep changing the angle of the punch to get an uneven pattern – this will add to a ‘tattered’, vintage look.

3. For the other papers spray some water with a mini mister around all the edges and leave it for a minute or so. This will soften the papers ready for the next step.

4. Working your way all along the edges pinch, crunch and wrinkle the papers. Then leave the papers to dry.

5. When dry, smooth the creases slightly and distress with the sanding file. Distress further with the distress ink. Once you’re happy with the look, adhere the layers together except the top patterned paper (we will come back to it in step 11).

For this step you will need: Cling Ruffled Corset stamp (UK peeps click here), stamping handle, Coffee Archival ink, White Opal Liquid Pearls, Viva Decor Transparent Croco, spatula, Inktense pencils (or alcohol markers), water brush, decorative card from leftover packaging, 3d foam pads and ivory card. Oh – and you also need a photo to scrap!

6. Stamp the Ruffled Corset with Coffee ink onto the cream card twice. The ink will react with the Croco medium and fade slightly adding to a vintage distressed look. If you want a sharper image use StazOn or Memento  ink instead.

7. Colour the corsets with your pencils/pens. Cover with Croco medium and leave to dry.

8. When dry, cut the stamped images into 3/4 width, one from the left and the other one from the right. Cut three matts from the decorative packaging card. Mount the corsets and the photo onto them with 3d foam pads.

9. Embellish the panels with Liquid Pearls as shown.

For this step you will need: Shabby White Embossing Enamel (UK crafters click here), Beacon’s 3 in 1 Advanced Craft Glue, Lettuce Colour Wash, Gold Cosmic Shimmer Mist, selection of lace, ribbons and fabric flowers, burlap, eyelets and eyelet setting tool.

10. Randomly spray the colour wash and the shimmer mist over the lace, ribbons and flowers.

11. Sprinkle the Shabby White enamel in the bottom right corner of the remaining patterned paper. Heat from underneath with a heat gun and watch the shabby magic happen. Repeat in the opposite corner.

12. Punch 8 holes in the enamelled areas and embellish with eyelets. Thread ribbons through the eyelets to mirror the lace up corsets. Finish the lace ups with bows and previously died flowers.

13. Adhere the last layer to the rest of the background papers.

14. Arrange the burlap, lace and images over the page and when you’re happy with the layout, fix them in place with the 3 in 1 glue.

Now onto my favourite part. You will need Champagne and Fresh Green glitters from the Glass Glitter kit, 3 in 1 glue, Shabby White moulded flowers, selection of additional pearl brads, sparklies and flowers.

15. Add pearls/brads and jewels as accents around the main photo panel.

16. Trace around the main photo with a generous layer of 3 in 1 glue, add some glue partially over the brads too.

17. Sprinkle the glass glitters over the glue.

18. Arrange a flower cluster below the photo from the fabric and moulded enamel flowers (you can watch my moulded flowers tutorial here).

For the final part you will need: Shabby White EE, embossing ink, die cut alphas, Lettuce Colour Wash, additional alpha stickers and die cuts.

19. Spray the die cut alphas with the colour wash and allow to dry.

20. Swipe the embossing ink over the letters leaving some areas dry. Sprinkle the Shabby White powder over the letter and heat with a heat tool.

21. Arrange all alphas and die cuts over the page and adhere with the 3 in 1 glue.

If you’d like to see additional close up photos of this layout, be sure to visit my blog!

I hope you enjoyed sharing my Dream Day with me! What would be/has been your dream day? Let me know in the comment below :).

Big hugs

Asia