We’ve seen fabulous rain drops, umbrellas and sweet baby colors so far with this month’s challenge. What showers will be in today’s Dream Team inspiration projects? Let’s go check them out!
Showers to Showers
We are excited to add a little more to our Dreamweaver posts with a wonderful archive of tutorials from the Paper Craft Planet blog. They will be a great way to keep the inspiration going with stencils you might already have in your stash.
These tutorials were published between 2011 and 2013 on Paper Craft Planet blog and are still available there. You can hop over to the Paper Craft Planet blog any time and search under the category Dreamweaver Stencils Tutorial Thursday to see them, but we thought it would be great to have them available here, too.
Originally posted April 4, 2013, Pam Hornschu is creating Showers to Showers with her Making a Point with Pointillism tutorial. Here is the post for convenience, but you can also click the tutorial’s title to see it on Paper Craft Planet.
The Dream Team for Dreamweaver Stencils have the challenge through the month of April to create with the theme of “Mists, Drizzles, and Showers”…which really can be left wide open to interpretation…and is just what they are hoping for. My version is quite literal, however. But the technique is a bit more unique…not new, just unique. The art of pointillism made it’s main debut in 1886 France with the artist Georges Seurat‘s most famous work, “Sunday Afternoon”, of which Wikipedia describes the technique:
“Motivated by study in optical and colour theory, Seurat contrasted miniature dots of colors that, through optical unification, form a single hue in the viewer’s eye. He believed that this form of painting, called divisionism at the time but now known as pointillism, would make the colors more brilliant and powerful than standard brush strokes.”
His works have always inspired me, and I was very fortunate to see another work hanging in the National Gallery in London, UK, entitled, “Bathers at Asnieres”. The style is truly amazing close up and from afar. I do not begin to compare my creation to his work, but inspiration can be found anywhere, and at any time.
Supplies:
Dreamweaver Stencils Umbrella, Rain, and Rain Words
Dreamweaver Stencils Translucent and Matte Yellow Embossing Pastes
Dreamweaver Stencils Paste Spreader, palette knife, stencil brush
Copic Sketch Markers (or other markers with small tips)
Premium white cardstock, orange cardstock, patterned paper
May Arts Cotton Twin-striped ribbon
Button, baker’s twine
Removable tape, embossing machine
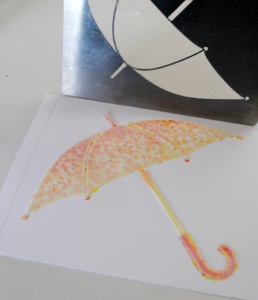
 Step #1: Machine emboss white cardstock panel with Umbrella stencil following this previously shown “sandwich” technique HERE. Place removable tape over stencil on embossed panel. Begin applying dots of color…darker and denser in the areas to be shaded, and lighter and more broken up in the areas to denote a source of light. Color handle as desired.

Step #2: With taped stencil still in place, spread Translucent Embossing Paste over surface, following the lines or bridges down the stencil to prevent oozing underneath. Lightly use the edge of the palette knife or paste spreader to remove excess and smooth surface in one swipe.
 Step #3: Carefully remove strips of tape from sides and bottom, and using top piece as a hinge, lift stencil up and away from the pasted piece. Set piece aside to dry until clear.

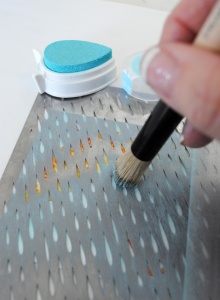
Step #4: Place Rain stencil over umbrella panel, and tape down to secure. With medium stencil brush, apply light blue ink through stencil.
Step #5: Remove stencil, and mat panel with coordinating cardstock. Embellish with pompoms if desired.
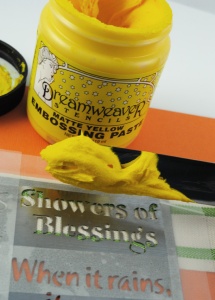
 Step #6: Mask off excess words on Rain Words stencil with tape. Tape stencil over ribbon, and paste emboss with Matte Yellow. Set aside to dry.
 Step #7: “Fishtail” cut ends of ribbon and adhere to card as desired.


This is such a pretty creation! I really love the colors of the umbrella and the raindrops stencil is a definite must have in my opinion! TFS!
LikeLike
Thank you for sharing these techniques. I love the idea of stippling the umbrella with copics and covering with translucent paste.
LikeLike